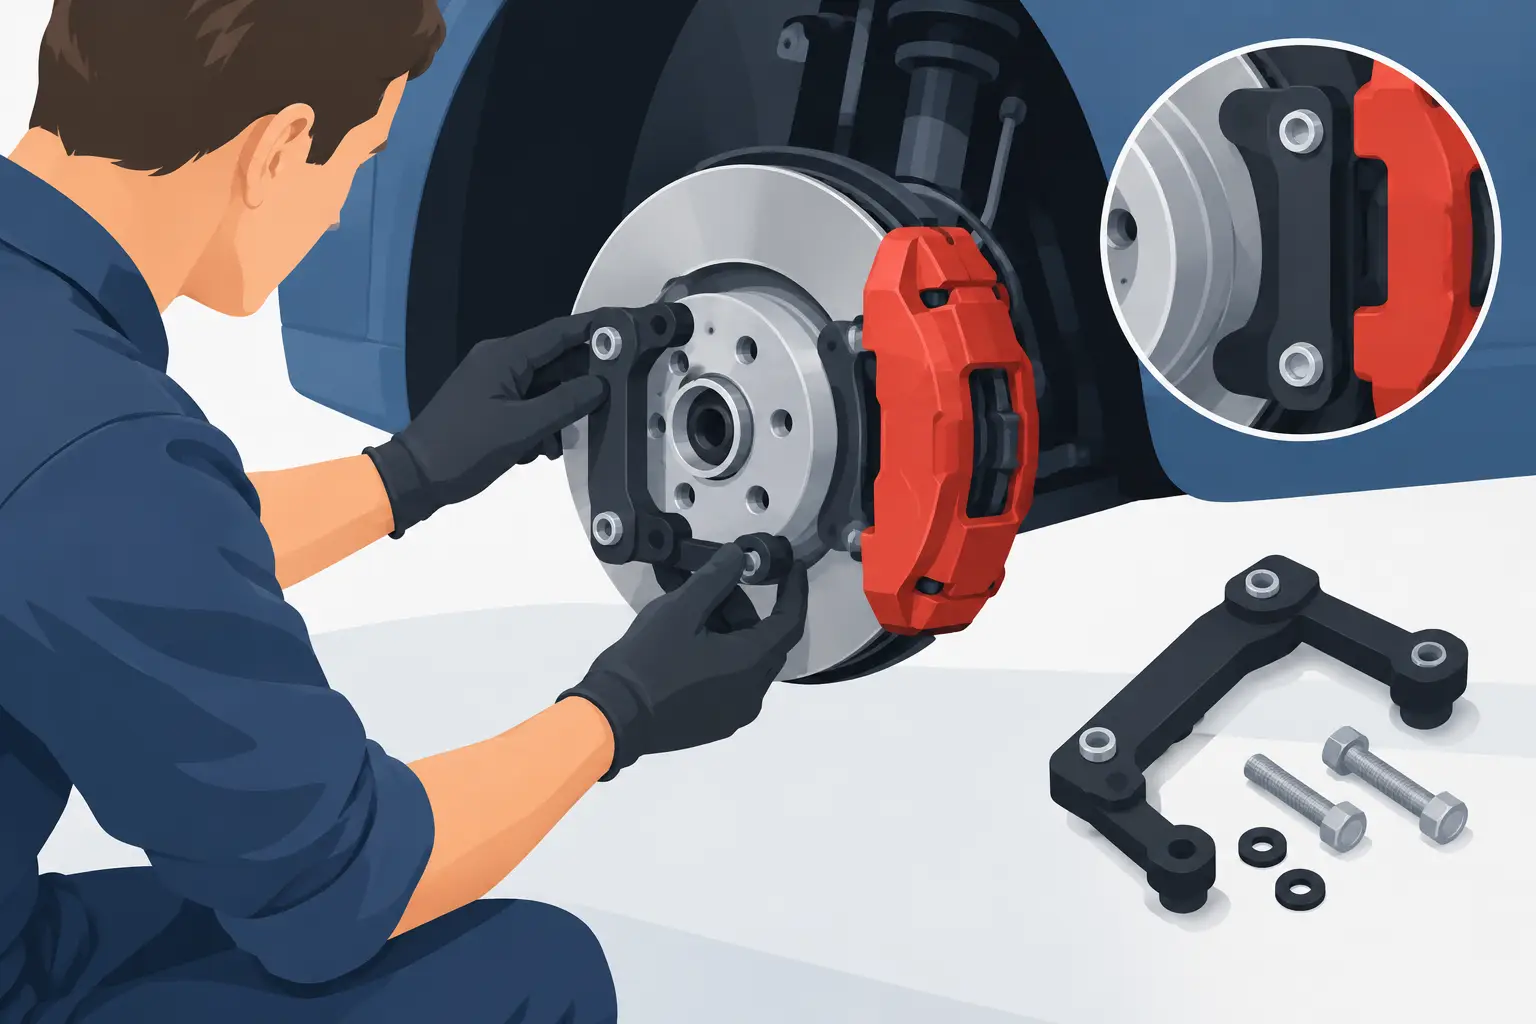
A brake upgrade isn't complete when the caliper is attached to the spindle. To install a caliper adapter correctly, the brake disc must be centered in the caliper, the pads must use the entire correct braking surface, and all fasteners must be torqued correctly. An adapter that is almost right is not enough when the temperature rises, the car brakes late, or the curbs come on the track quickly.
The caliper adapter is the link between your car's spindle and the upgraded caliper. It determines both the lateral position of the caliper and its radius against the brake disc. Therefore, it is a precision part, not a universal solution that can be made to work with a few extra washers from the box on the workshop bench.
Start by checking that the package is complete.
Before tightening the first bolt, check the part numbers for the adapter, caliper, brake disc, hub and rim. Many kits are built for a specific disc diameter, disc thickness and offset. Two brake discs with the same diameter can still place the braking surface differently in or out of the hub.
Please measure the actual thickness of the disc and check its height, i.e. the distance from the hub contact surface to the brake surface. Also check that the hub surface is clean and flat. Rust, paint residue or an old brake disc that has left deposits can move the disc enough to cause skewed centering in the caliper.
This is especially true for builds where parts are combined from different model years or platforms. A larger caliper and a larger disc do not automatically mean better brakes. The piston area, master cylinder, pads and the car's use must also work together. On a pure track car, an aggressive kit can be just right, while the same combination can be difficult to dose and cold on the street.
Check the position of the disc before final assembly
Mount the brake disc on the hub using the wheel bolts or nuts and some suitable spacers so that the disc fits as it would when the wheel is mounted. Simply hanging the disc loosely on the hub can give misleading control.
Spin the disc and check that it moves freely against the dust cover, steering knuckles and other parts. A dust cover that is rubbing may sound like a small scrape in the garage, but over a long session it can create heat, vibration and unnecessary wear. Adjust or remove it only if it is appropriate for the car and the brake kit.
Install the brake caliper adapter correctly in the correct order
Clean threads and mating surfaces thoroughly. The adapter should lie flat against the spindle without dirt, rust flakes or burrs between the surfaces. Do not use washers between the adapter and spindle to correct a poor fit, unless specifically provided or specified by the manufacturer. Washers in the wrong place will change the load on the attachment and may move the yoke out of position.
Start by mounting the adapter to the spindle. Use the bolts included in the kit or bolts with the exact dimensions, strength class and length specified. A longer bolt is not automatically better. It can bottom out in a blind hole, go into the hub area or provide the wrong clamping force even though it feels tight.
Tighten the bolts gradually and alternately with a torque wrench according to the brake kit specification . If the manufacturer prescribes threadlocking, the correct amount should be used on clean and dry threads. Do not pour threadlocking everywhere on the routine. The wrong product or too much agent can affect the torque and make future servicing unnecessarily difficult.
Once the adapter is installed, attach the caliper to the adapter. Make sure the bolts have sufficient thread engagement and that the caliper is fully seated against its mounting surface. Never use old, rusty caliper bolts from another brake solution just because the threads happen to fit.
Center the caliper over the brake disc.
Now comes the check that determines whether the build works under load. Look through the caliper and compare the air gap between the brake disc and both sides of the caliper. The disc should be centered in the caliper according to the kit's design. On a floating caliper, some movement may be normal, while a fixed multi-piston caliper requires the disc to be centered in the caliper.
Also check the pad sweep. The pad should work over the friction surface of the brake disc without going beyond the outer edge or going too far towards the disc cap. A small defined edge may occur depending on the design, but a large overhang is a stop sign. In this case, it is often the wrong adapter, the wrong disc or the wrong combination of hub and spindle.
Some motorsport kits use specified shims for fine adjustment. In that case, use only the shims that come with the kit and place them exactly where the instructions state. Experimenting with washers between the yoke and adapter can give rim clearance at the expense of disc centering, or vice versa. Measure first, then modify with parts intended for the job.
Rim clearance is more than just the wheel turning
A large caliper can collide with the spokes even if the rim diameter is sufficient. Test fit the rim without forcing it and spin the wheel at least one full revolution. Check the radial clearance against the top of the caliper, the axial clearance against the spokes and the space for balancing weights on the inside of the rim.
Also keep in mind that rims with the same inch size can have completely different internal shapes. An 18-inch rim that accommodates a large racing yoke in one design may fit directly in another. A wheel spacer can create spoke play, but it changes the track width, load on the wheel bearings and often the need for longer wheel bolts or studs. Do not choose a spacer as the first solution without checking the entire wheel package.
Check the brake hose in both full steering wheel travel and through suspension movement. The hose must not be stretched, folded, touching the tire or rubbing against the rim and strut. On a car for drifting, rallying or track driving, the wheel moves considerably more than when the car is lifted in the garage.
If the hydraulics have been opened: bleed and check the pedal
If you have replaced the caliper or disconnected the brake hose, the system must be bled according to the instructions for the car and the brake kit. Start with the correct brake fluid for the temperature the car will be running in. For track driving, the fluid needs to withstand high heat, but it should still be compatible with the system seals and your planned service interval.
Bleed until the fluid is free of bubbles and the brake pedal feels firm. On calipers with multiple bleed nipples, the nipple to be bled is normally at the top. If the caliper happens to end up with the bleed nipple facing down, the caliper is mounted on the wrong side, and you will not be able to bleed the air properly.
Then, check each connection for leaks while a helper holds the brake pedal down. Also check the ABS sensor cable, brake hose fittings, and all clamps. A brake upgrade should withstand vibration, heat, and full steering wheel travel, not just look good on stands.
The final checks before the first run
Install the wheels with the correct torque and lower the car. Pump the brake pedal before moving the car so that the pads engage the discs. The pedal may sink the first few times after a caliper change – this is normal before the pistons have taken up the play. It should then become firm. If it is long or soft, the car should be left until the cause is resolved.
Do your first test drive at low speed in a safe place. Listen for scrapes, metallic knocks and vibrations. Brake gently at first, check the temperature and check for leaks when the car is back. Then follow the pad and disc manufacturer's break-in procedure. Proper bedding provides an even coating film on the disc and reduces the risk of uneven braking feel later.
After the first heat cycle and again after a few miles or a shorter session, the bolt torque should be verified according to the component manufacturer's instructions. This is especially wise on new builds where paint, finishes and mating surfaces can settle.
Brakes are no place for guesswork. If the disc is not centered, the rim is close or you lack torque data for the mount, pause the build and get the right information or the right parts. At House of Motorsport, the goal is always the same as in the pits: parts that fit together, hold up to the ride and let you focus on the next braking point.